Sunday, December 31, 2017

Lemon Rosemary Chicken


Lemon Rosemary Chicken

This week my little slice of the Midwest is blanketed in about 7 inches of the fluffiest snow I've ever seen.  Being a Georgia Boy at heart,  we couldn't resist the urge to brave the elements and take the girls out and play..  Brr!  Winter is definitely here.  Culinarily speaking, nothing yells winter to me like rosemary and citrus. 

This recipe serves 5, and takes around 30 minutes start to finish.

After breaking down a few whole birds this weekend (See this week's Random Thoughts), I have some chicken to cook.

For plating purposes,  let's start with the side:  Creamed Spinach


What you will need for the spinach...
  • Baby Spinach...........................10 oz
  • Heavy Cream............................4 oz
  • Cream Cheese...........................4 oz
  • Parmesan, grated.......................4 oz
  • Kosher Salt................................1/2 tsp
  • Garlic Powder............................1 tsp
 
What you will need for the chicken..
  • Chicken Breast, 5 oz.................5 ea
  • Rosemary, chopped fine...........1 tsp
  • Lemon Zest...............................1 tsp
  • Kosher Salt...............................1 tsp
  • Garlic Powder...........................1/2 tsp
  • Avocado Oil.............................1 tbsp.

How' it's done...

This is a tale of two skillets -  but first, set your oven to 350F.

Skillet 1.  Largest one you have, preheated medium low - to medium.


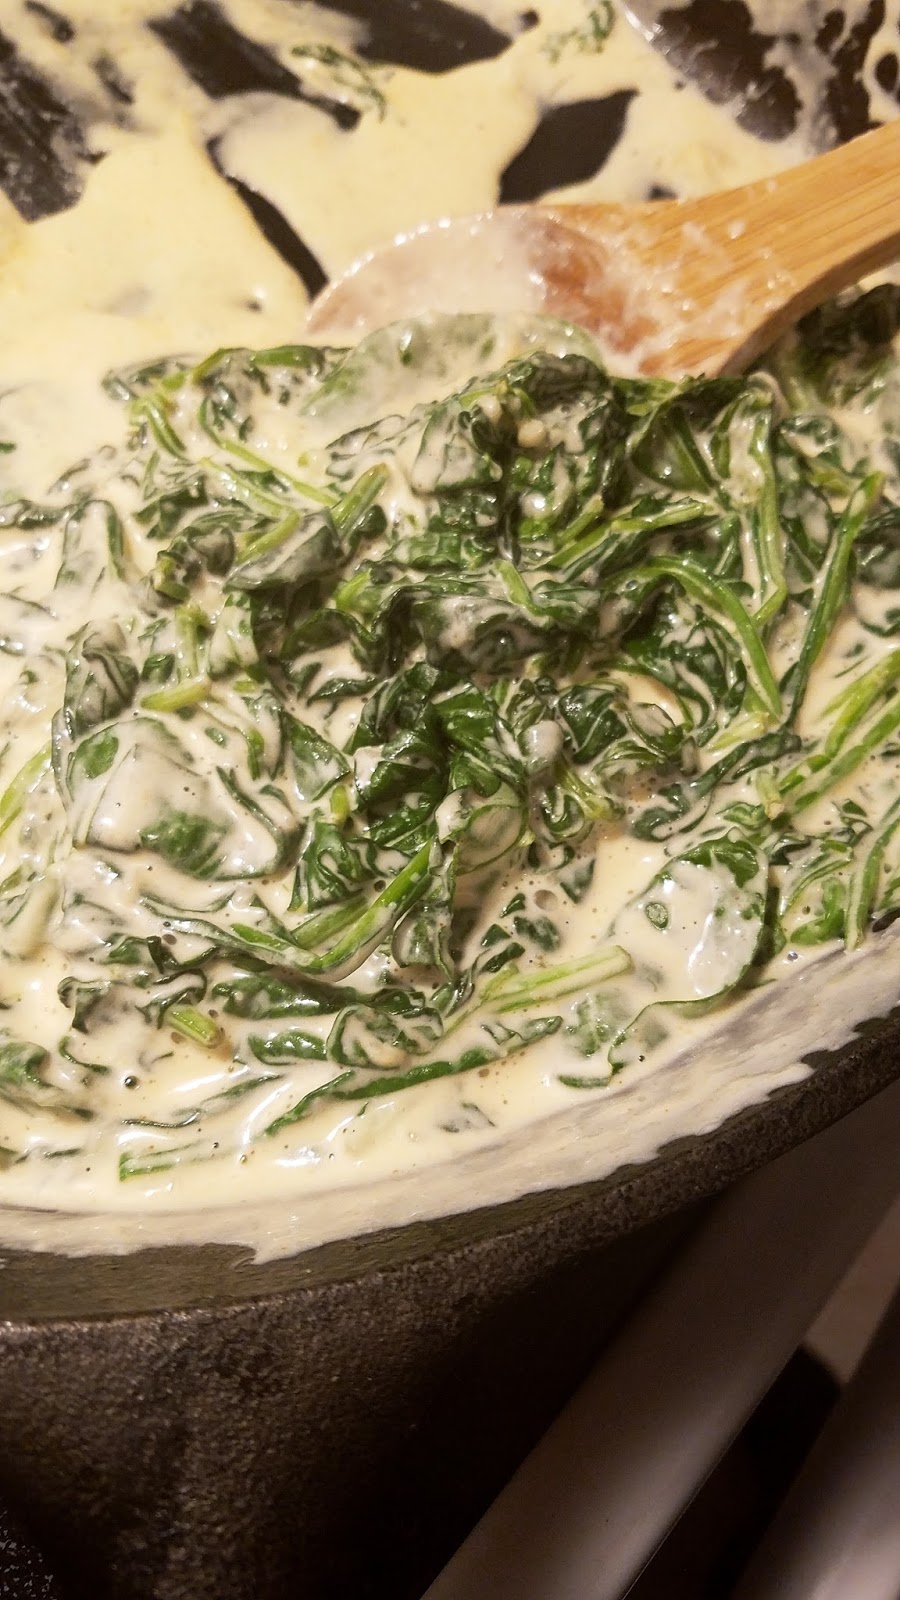
Add your heavy cream, and once it starts to bubble around the edges,  add your cream cheese.  (cutting your cheese into blocks helps with this step; as well as having it softened.)  Using a whisk,  or I'm a nut for a good ole' wooden spoon,  fully incorporate cream cheese with heavy cream..  It's going to look a little thicker than you think it should, but that's okay.  Incorporate fully, then add the salt and garlic powder.

Once you have that together,  throw in your spinach and things will come together quickly.  If you don't have enough room in your skillet for all the spinach at once;  add it in batches till it all wilts down.  You don't want to kill the spinach here;  Just til it wilts slightly.  Once wilted, grab a 1/4 cup measuring cup and 5 food prep containers.  Evenly distribute spinach into the containers using the 2 oz cups.  Grab a teaspoon and evenly distribute any remaining cream sauce into the container as well..  It should be relatively saucy.  This is a good thing for reheating.


Skillet 2.  Combine your spices in a bowl -  I added my zest an rosemary together and chopped them at the same time.  This will be a super fragrant spice rub.  Place your chicken on a sheet pan, and liberally season with the spice mixture.  Flip, repeat.

Have a hot skillet - medium to medium high -  ready to rock.  Add your avocado oil, and once you see the glisten of the oil;  you're ready to add the chicken.

Once you add the chicken to the skillet; Let it be!  You want to get a good sear, and you won't achieve that by moving it around.  Flip around the two minute mark, and repeat for another two.  After that, throw it in the oven. You'll want to cook your chicken breast till it reaches an internal temperature of 160F, and let carry over to 165F. 


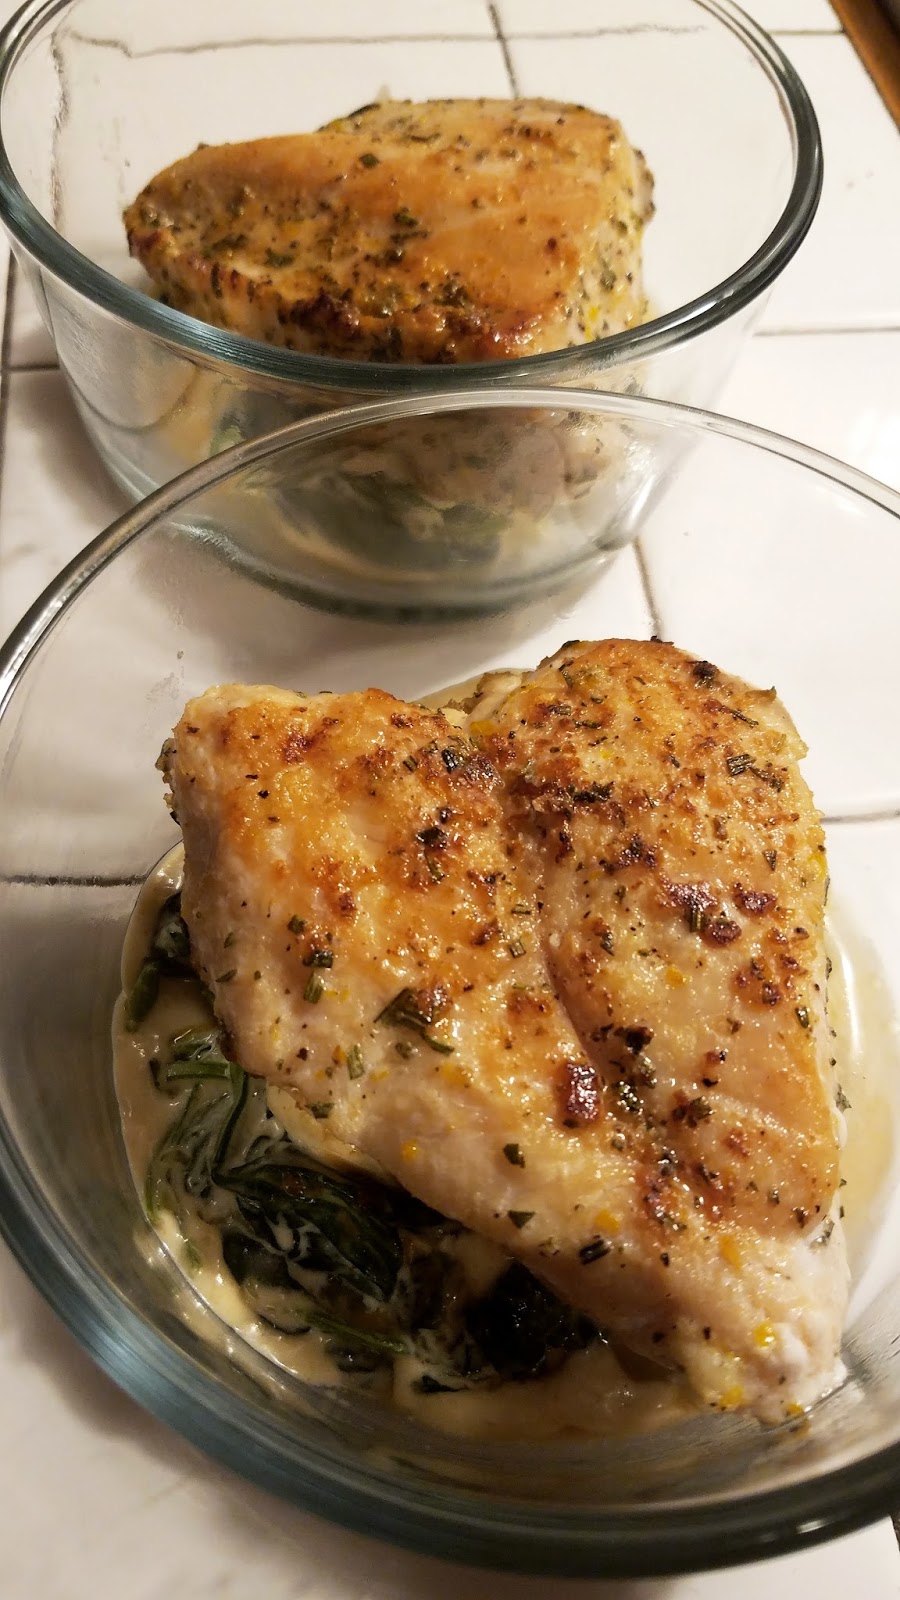
Once finished, place on top of your spinach and you're good to go!  Lemon Rosemary Chicken with Creamed Spinach.


Nutritional speaking, this is exactly what I'm looking for calorically.  just over 400 calories.  The only downside to this dish is the abundance of protein due to the chicken breast.  If you're looking to up the fat, you could substitute boneless chicken thigh, and leave the skin on and this would be phenomenal.  I was using what I had on hand (hence me always using garlic powder instead of using fresh garlic.  Use what you have!) 


Thanks for reading everyone,  See you tomorrow.


Friday, December 29, 2017

Random Thoughts: Bone Broth

Bone Broth.  Stock.  Whatever you call it.  It's essential.  It's delicious.  If you buy it;  It's expensive..

Especially for a collagen rich broth worthy of reducing (e.g. that frozen bagged stuff in the paleo section at that big blue store down the road).   The term bone broth is super hot right now;  but it's a little misleading.
  • Broth:  liquid byproduct of slow simmering meat, vegetables, and herbs. 
  • Stock:  liquid byproduct of simmering bones, vegetables, and herbs overnight (or longer)  in water.
Occasionally when I'm looking for a quick weeknight meal, and I'm in that in-between period between meal preps, we will go by the local grocery place and pick up a rotisserie chicken..  I'll break down the bird, and throw the carcass in a bag in the freezer with intentions of making stock.

A friend of mine scored a phenomenal find at the local grocery store this week:  Whole chickens for a little over a buck each!  She asked how many she should pick up;  I told her, "All, please."  She brought me three young fryer chickens. Score.

The results were:  Twelve 5 oz boneless skinless chicken breast,  12 wings (sectioned), Six leg quarters which I shredded the meat, and three carcasses.  For three bucks.  I'm still pretty pumped about it.

Essentially there's two types of stock:  fond blanc (white stock) -  fond brun (brown stock)

With the deeper flavor, I always go with the brown stock, which requires roasting your bones.

I took my bones and carcasses and drizzled with avocado oil, hit it with a little salt and pepper, and roasted them for 30 minutes at 450F.  Throw them in your largest stock pot.  Deglaze the sheet pan, and pour that in over the bones.

I rough cut three onions, and a couple of stalks of celery, and add them to the party.  throw a couple of bay leaves, a few peppercorns, whatever herb remnants I have on hand (except for cilantro.  I love cilantro, but it has it's place.)  parsley, rosemary (in moderation), thyme, oregano -  all good choices.. I typically use stock as a place to burn out random ingredients I have on hand - when they make sense..  Leeks, onion, celery, (I would use carrots, but being keto we typically don't have those on hand.)

I know you've been at the store and seen the packs of chicken feet and thought, who on Earth uses these?  This is what it's for.  They're super rich in collagen and make a great addition to your stock.  treat them just as you would your bones.

After all the ingredients are in the pot, I cover the bones at least an inch with ice water, bring it to simmer and let it go overnight, covered.  Starting with ice water is something I've always done.  Bringing the ice water to a boil extracts more collagen from the bones and makes a richer stock. 

Take a fine mesh strainer, strain into a couple of shallow pans, and cool..  If you have an ice-wand this would be a great time to use it.  If not, just make sure you don't pour all of your hot stock in one large pot to cool.. 

I portion half of my stock in quarts, and the other half in pints so I can use in smaller batches for recipes.
 
I didn't intend this to be a recipe for stock -  Just a discussion into my process, and to emphasize look for that deal when shopping after the Holidays!  I'll post a formal recipe of my process when I make my next batch, complete with pictures and a printable recipe.

For those of you who make your own bone broth -  how does your process differ?
Do you ever reduce it for sauces?  Would love to hear from you.

Thanks for reading;  See you Sunday!

Wednesday, December 27, 2017

Chimichurri Flank Steak


Chimichurri Flank Steak


Chimichurri is a South American marinade or condiment made from a variety of herbs.  I've experimented a lot with it over the years, and have found this recipe to be my favorite.  I prefer it to be a salsa or topping rather than a marinade due to the off-putting presentation of the green marinated beef.  The strong flavor of the sauce lends itself well to the smokiness of the rub so the extra time to marinade is not needed.


What you will need:
For the steak.. 
  • Flank Steak             2 #
  • Chili Powder           1 tsp
  • Cumin                     1 tsp
  • Smoked Paprika      1 tsp
  • Kosher Salt              2 tsp
  • black pepper         1/2 tsp
  • Avocado Oil             1 tbsp

For the "rice"...
  • Cauliflower             (1 head)
  • Avocado Oil             1 tsp
  • Salt                           1 tsp
  • Onion, fine diced     2 oz
  • chopped garlic          1 tsp
  • Water (or stock)        1 C
For the Chimichurri
  • Chopped Cilantro     2 C
  • Lemon Juice             1 oz
  • Lime Juice                1 oz
  • Olive Oil                   4 oz
  • Chopped Garlic        1 tbsp
  • Salt                            1 tsp
  • Red Pepper Flake      1 tsp
  • Dried Oregano           1 tsp


How it's done..

Preheat your oven to 350, and set a cast iron skillet to medium high heat.

Combine the Chili, Cumin, Salt, Pepper, and Paprika in a bowl.  I find a huge difference between regular paprika and smoked..  I'm a huge fan of Smoked,  my wife - not so much.  If you find the smokiness a bit too invasive,  feel free to use regular paprika.  Liberally coat both sides of the flank.

Add your avocado oil to the skillet.  Avocado oil is great for this application due to it's relatively high smoke point (500 degrees) that prevents the oil from breaking down and burning.   Add the flank to the smoking skillet.

While your flank is searing (about 2 minutes per side, then finish in the oven)  turn your attention to your cauliflower.  Break or cut the cauliflower into small pieces, ideally quarter sized.  When you have the stem removed, and you're left with a bowl of small florets, place in batches into your food processor and process on high.  Only fill your processor half way so as to not over process the cauliflower.  You want it small pieces; but not couscous small..  that's another recipe.  

Be sure to keep an eye on your flank -  Time varies, but what you're looking for is an internal temperature of 135 degrees F (125 for medium rare,  145 for medium well..  trust me, it will carry over to the appropriate temperature.)  Once you hit the temperature you're aiming for, pull it out of the oven and allow it to rest for at least 15 minutes while you finish the rice and sauce.

In a wok or large skillet on medium high heat -  add 1 tsp avocado oil, and sautee onions.  You're looking for soft and fragrant.  Add your garlic and sautee for another minute, then add your cauliflower and salt.  After I incorporate my onions and garlic into my cauliflower;  I let it sit for about 20 seconds just to build the heat back in the pan -  then I add the water (or stock) and throw a lid on it.  This will steam the cauliflower without overcooking it.  At this point I take it off the heat, and leave it covered until I'm ready to plate -  almost like couscous.

Grab your food processor that you just cleaned from making your rice (of course you didn't just leave it dirty on the counter)  and add the olive oil for the chimichurri.  After the oil is in; add the cilantro, then pour the remaining ingredients on top.  Process on high until it's a chunky sauce like consistency.  It should be thick.

Slice your flank (in half long ways, then against the grain in thin strips at an angle)  The thinner you slice these, the better the result (within reason -  You want between 1/8" and 1/4" slices)  After that; you're ready to assemble.


In 6 microwaveable containers, start with 1/2 C packed rice;  right in the middle.   Divide your Flank up directly on top and press down slightly.  Finish plating with the Sauce, right on top.  It's okay -  Food should touch.


The intense flavors of this dish -  the acidity of the lemons and limes -  the kick from the cilantro and red pepper flake -  make this a go-to for me.  The Macros are a little high on the protein for me to eat more than once a week -  so you'll have to watch what other meals you pair it with.  The good thing about this meal is how filling it is for just shy of 500 calories
.
I hope you had fun reading this with me; and I hope you have more fun in  your kitchen.  Be sure to send me some pictures;  I'd love to see your guys' take.

See you Friday.

First!

Welcome to our first post!  We would like to to take this opportunity to tell you a little about ourselves, and what we envision for this site..
As a classically trained Chef, I've spent years devoting my life to food.  Being raised in the rural South;  every holiday,  every gathering,  every tradition was an excuse to over-indulge on the very thing that brought us life:  Food.

We grow older - memories turn to habit - that combined with the over stretched hustle we find ourselves in; our primal instinct to eat to live has mutated into a constant need to feed ourselves foods we tell ourselves are "good for us."  

In my journey to live healthier, I've had moderate success with Calories in vs. Calories out.  Calories are real;  and they matter..  but something still wasn't clicking..  It wasn't until my family decided to adopt a ketogenic lifestyle that things really fell into place.

This isn't a blog for someone who's done it -  who's met their goals - The master here to teach.   These are the tales of a student, who's constantly trying to better himself, and his family by making what we believe are the best health choices possible.

Like you,  I live a busy life.  As much as I love this lifestyle, working the hours I work, I'm not available to cook three meals a day..  Enter the benefits of Food Prepping.  Food Prepping allows me to focus the time I have home with my family instead of constantly cooking, and doing dishes.  It also takes the guess work out of portion control and nutrition.

We are intending on the following content on Keto Togo:
  • New Recipes:  Wednesdays & Sundays
  • Random Thoughts/Health Updates:  Mondays & Fridays
Thank you for taking the time to read this, and we hope you find this information applicable to your life to help you achieve your long term health goals, and improve your quality of life.

R